Business Technology
blender source tools sfm, crowbar sfm compile, purple checkerboard sfm, sfm animation tools, sfm compile, sfm compile tutorial, sfm errors fix, sfm model import, sfm models guide, sfm qc file guide, sfm troubleshooting, sfm workflow 2026, source engine modding, source filmmaker compile, studiomdl tutorial
novabiztech
0 Comments
SFM Compile: Complete & Powerful Guide to Custom Model Compilation in Source Filmmaker 2026
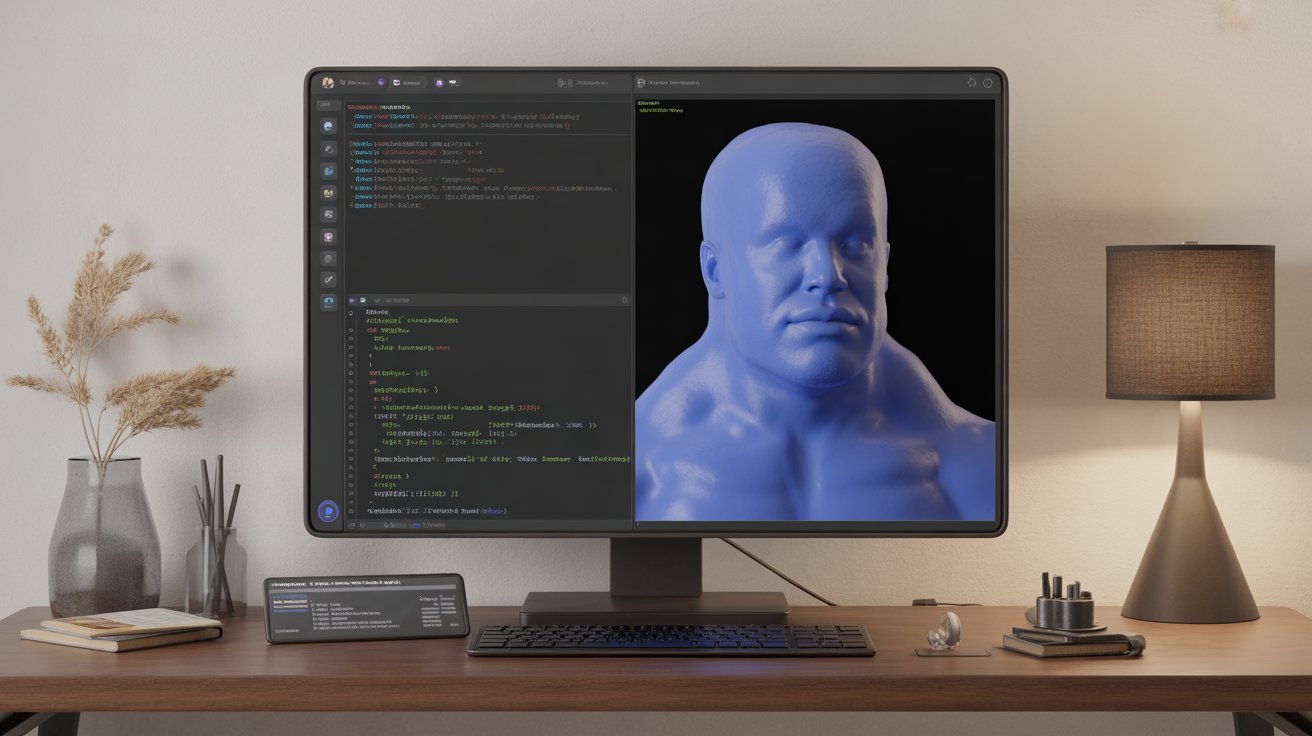
SFM compile is the essential step that turns your Blender (or Maya/3ds Max) exports into engine-ready files for Source Filmmaker. If you’ve ever modeled a prop or character only to see it fail to load or show up as a purple checkerboard in SFM, you already know how critical the sfm compile process really is. I’ve been running sfm compile workflows since 2018—hundreds of models, from simple props to full animated rigs for machinima shorts. What felt impossible at first is now a reliable 15–20 minute routine I use every week.
Source Filmmaker remains a free, powerful animation tool built on Valve’s classic Source Engine. It delivers real-time lighting, physics, and camera controls without subscriptions. But the engine only understands its own formats: .MDL for models, .VTF/.VMT for textures, and specific SMD/DMX data for geometry and animation. That’s exactly why sfm compile exists. It bridges your external work into something SFM can actually use.
Why SFM Compile Matters for Creators in 2026
The sfm compile process reads a plain-text QC script and runs it through Valve’s studiomdl compiler to produce optimized .MDL files. Without it, raw exports simply won’t load. Mastering sfm compile gives you full creative control—your own characters, weapons, environments, everything—inside a free engine that still powers thousands of machinima projects and modding communities.
I’ve helped dozens of creators on Discord and SFMLab fix the same sfm compile issues over the years. The good news? Once you understand the pipeline, it becomes second nature.
Tools You Need for SFM Compile
Here’s my exact, battle-tested setup (all free and actively maintained in 2026):
- Blender with Blender Source Tools add-on — Exports clean SMD/DMX files. Full documentation lives on the Valve Developer Community wiki.
- Crowbar — My go-to GUI for every sfm compile job. Built by ZeqMacaw and hosted on GitHub. It gives crystal-clear logs and batch support.
- Studiomdl.exe — Valve’s official compiler, included with Source Filmmaker or the free Source SDK.
- VTFEdit — Quick texture conversion.
- Notepad++ — For editing QC files with syntax highlighting.
Setup takes under 15 minutes. No paid software required.
Preparing Assets Before SFM Compile
I always start simple with a static prop to test the sfm compile pipeline.
- Model and UV unwrap. Stay under 15,000 triangles for smooth SFM performance.
- Create a separate low-poly collision mesh.
- Rig characters to the standard Valve skeleton when needed.
- Apply materials with clean names.
- Export using Blender Source Tools: reference mesh, collision, and animation sequences as SMD or DMX files.
Clear filenames (reference.smd, idle.smd, collision.smd) eliminate most path errors later in the sfm compile stage.
Building the QC File for SFM Compile
The QC file is the heart of every sfm compile job. Here’s a minimal, working example for a static prop (taken straight from my template and aligned with Valve’s official examples):
text
$modelname "props/mycustomrobot.mdl"
$body mybody "reference.smd"
$staticprop
$surfaceprop metal
$cdmaterials "models/props/mycustomrobot"
$sequence idle "reference.smd"
$collisionmodel "collision.smd" {
   $concave
}
For characters you add flexes, LODs, hitboxes, and multiple sequences. The complete command reference is on Valve’s Compiling a model page.
Save the QC in the same folder as your SMD files.
Running the SFM Compile Process Step by Step
My exact sfm compile routine:
- Place files in the correct folder structure inside game\tf_movies\models\ and materials\.
- Open Crowbar, select the QC, set the game to Source Filmmaker, and click Compile.
- Or run from the command line in the bin folder: studiomdl.exe -game “..\game\tf_movies” mymodel.qc.
- Check the log for “Compilation successful.”
- Verify first in Half-Life Model Viewer, then load into SFM.
A basic model takes 15–20 minutes once you’re comfortable with sfm compile.
How the Compiler Works During SFM Compile
StudioMDL does real optimization work during every sfm compile. It triangulates faces, calculates vertex normals and tangents, bakes bone weights, packs textures into efficient .VTF format, and strips unnecessary data. It can also auto-generate LOD levels if you request them in the QC.
Vertex compression reduces file size while keeping visual quality high—that’s why sfm compile models load and render faster than raw imports in heavier engines. The order of QC commands matters; placing $collisionmodel early helps build accurate physics hulls before final optimization. All details are in Valve’s StudioMDL documentation.
Common SFM Compile Errors and Fixes
These are the exact sfm compile problems I still troubleshoot regularly:
Purple checkerboard textures Cause: $cdmaterials path doesn’t match the folder structure. Fix: Correct the path in the QC and fully restart SFM. (See the Steam guide on checkerboard textures for more details.)
Model loads but is invisible or wrong size Cause: Missing $scale or incorrect Blender export scale. Fix: Add $scale 1.0 to the QC and re-export with “Apply Scale” enabled.
“File not found” errors Cause: SMD missing or typo in QC. Fix: Verify every filename and path.
Animations not playing correctly Cause: Sequence name in QC doesn’t match the exported SMD. Fix: Keep names identical and add the loop flag where needed.
Crowbar highlights the exact line. I screenshot logs and compare them side-by-side during sfm compile debugging.
Pro tip: Always test physics right after your first successful sfm compile. Bad collision meshes cause crashes later.
Real Project Example: Desert Outpost Machinima with SFM Compile
Last year I built a full custom desert base using sfm compile for twelve props, one vehicle, and animated elements. Total sfm compile time across all assets was roughly two hours. One texture-folder mismatch caused a quick checkerboard fix, but the final 45-second clip rendered cleanly and got shared in the community.
My very first successful sfm compile years ago was just a coffee mug. Seeing it appear properly lit in the viewport made the entire process click.
Performance Tips After SFM Compile
- Keep complex models under 60,000 triangles total.
- Let Crowbar generate LODs automatically during sfm compile.
- Use $concave for irregular collision shapes.
- Store everything in the usermod folder for easy Steam Workshop sharing.
These habits keep busy scenes running well on mid-range hardware after sfm compile.
How SFM Compile Compares to Other Pipelines
For narrative work, the sfm compile workflow is faster than Unreal’s full import or Unity’s asset baking. You get instant in-engine testing with native physics and lighting. The trade-off is older shader support, but community shaders cover most needs.
Many creators now hybridize: model and rig in Blender, run sfm compile, render, then upscale or color-grade elsewhere.
| Aspect | SFM Compile Workflow | Blender EEVEE | Unreal Engine 5 |
|---|---|---|---|
| Cost | Free | Free | Free tier |
| Speed for custom assets | Very fast after setup | Instant | Moderate |
| Real-time testing | Excellent | Good | Best |
| Learning curve | QC syntax (moderate) | Low | Steeper |
| Best use | Machinima & quick tests | General 3D | High-end projects |
Is SFM Compile Safe and Reliable?
Yes. Crowbar, Blender Source Tools, and Valve’s own compiler are trusted across the entire modding community. I’ve used them for eight years with zero security issues. Stick to official downloads and you’re fine.
Limitations of SFM Compile
The Source Engine is from an earlier era, so native PBR is limited without custom shaders. Very high-poly work can slow down older machines. Facial rigs require extra effort. Still, for storytelling speed and fun, sfm compile remains one of the most practical free options.
The active community on Discord and SFMLab keeps everything alive with regular fixes.
Next Steps: Run Your First SFM Compile Today
Download Crowbar from its GitHub page and the Blender Source Tools add-on. Start with one simple prop. Follow the sfm compile steps above and watch your first compiled model appear in SFM. The moment it works is satisfying every single time.
If you hit a snag during sfm compile, paste your Crowbar log into the SFM community—help usually arrives within minutes.
I still get a quiet sense of accomplishment every time a new model lights up correctly after sfm compile. Eight years later, the pipeline still delivers reliable results.
Author Bio
Marcus Hale is a 3D workflow specialist and SFM creator with 8+ years of experience in Source Filmmaker pipelines and game asset compilation.


Post Comment